Key Takeaways
- Print a cube model: Choose a cube model with known dimensions and print it with low tolerance filament. Align the cube edges with the right axes in the slicer.
- Measure the printed cube: Use digital calipers to measure the length of each side of the cube and note down the values for X, Y, and Z axes.
- Send G-code commands: Connect your printer to a slicing software that allows direct communication. Use M92 command to get and adjust the current steps per millimeter for each axis.
- Fine-tune the steps: Calculate the new steps per millimeter by dividing the model length by the printed length and multiplying by the current steps. Input the new values using M92 command again.
A calibration cube is a tool with known dimensions designed to test the printing accuracy of a 3D printer.
If you print an XYZ calibration cube and it ends up with the same look and measurements as the model in the slicer, it’s safe to say that the printer is well-calibrated.
Calibration involves finetuning the movement of a 3D printer’s parts. Specifically, you’re instructing a printer’s stepper motors to make a certain number of micro steps during each small movement.
Done properly, calibration can eliminate many printing errors and give you pinpoint accuracy in your prints.
In this article, I’ll explain when you should calibrate a 3D printer and how to do it. I’ll also share some STL files of the best calibration cubes you can print to test your printer’s precision.
How to Use a 3D Printer Calibration Cube
- When to Use – Calibrate before first use or when changing filament.
- Getting Started – Everything you need to start calibrating.
- Best Calibration Cubes – STL files for basic, hollow, layered and themed cubes.
- Printing the Cube – Align, level bed, print, and measure.
- Calibrating Your Printer – Using your cube to adjust motor steps per mm.
- Key Takeaways
- How to Use a 3D Printer Calibration Cube
- When to Use a Calibration Cube
- Getting Started with Calibration Cubes
- The Best 3D Printer Calibration Cubes
- Basic Calibration Cube
- Hollow and Thin-Walled Cube
- Themed Calibration Tools
- Layered Dimensional Cube
- Printing the Calibration Cube
- Calibrating Your 3D Printer
- More Troubleshooting with Calibration Cube
When to Use a Calibration Cube
Calibration helps you find out whether a 3D printer’s stepper motors are moving with the right precision, an important factor in creating dimensionally accurate prints.
Without proper calibration, a 3D printer may give you inaccurate dimensions in your prints even with top-quality filament and a perfectly working extruder. General-purpose objects, such as toys, may get away with loosely inaccurate dimensions. But if you’re printing mechanical parts that require low tolerance and no room for error, you want your printer to be as precise as possible.
The most obvious sign that a printer is not well calibrated is inaccurate print dimensions. Ideally, the printed object should come out with the same measurements as those in the STL file of the calibration cube. But with an uncalibrated printer, the measurements in your STL file may not match those of the real print, typically being less or more by a few millimeters.
In addition, an uncalibrated printer can create a bunch of print defects like elephants foot, stringing, and poor surface finishes.
Calibration all comes down to the mechanics of your stepper motors. A 3D printer’s stepper motors are supposed to make a defined number of steps per millimeter, and anything beyond or short of that number can lead to inaccuracies.
For example, if an X-axis motor set at 200 steps per rotation is making 180 steps because it’s uncalibrated, you’ll notice your X-dimensions being shorter by a couple of millimeters when you measure your print.
While uncalibrated stepper motors certainly lower printing precision, an uneven bed can also lead to skewed print measurements along the Z-axis. To rule out any bed-related inaccuracies, it’s crucial that you level your print bed before using a calibration cube.
So, when is the right time to bring out the calibration cube test?
You have to calibrate your printer before using it for the first time. New printers typically need to be tweaked to re-adjust any mechanical bits that shifted due to shipping and assembly. But it also helps to do some calibration from time to time, especially if you’re trying to print something that requires high accuracy or shifting to a new filament type.
Every filament has different material properties that can create slightly different outcomes on the build plate under given printing conditions. Using a calibration cube helps you understand how differently your new filament extrudes, allowing you to make adjustments to certain parameters.
For example, as ABS cools, it’s more prone to shrinkage than PLA. This shrinkage can reduce the print’s dimensions, particularly in the first layers. A calibration cube helps you understand how the new filament is printing and whether you need to make any changes in your printing process.
Getting Started with Calibration Cubes
To do a calibration cube test, you need a combination of hand tools and software. Here’s what you need to get started:
- FDM 3D printer: This is the printer that you want to calibrate; every printer requires its own calibration.
- 3D printer slicing software: 3D printer calibration involves sending G-code commands directly from a slicer to a printer and collecting the printer’s response to the command. Specifically, you’re trying to find out the current values of stepper motor motion along the X, Y, and Z axes and how accurate they are.
This is why you need a slicing program that can communicate with your printer in real-time. Some popular slicers like Cura do not allow that back-and-forth data exchange between printer and slicer, so you might want to go for something like Octoprint or Repetier. - Connection between printer and slicer: You need to connect the slicer to the printer to allow direct command input. Depending on your printer and slicer of choice, this could be via a USB or printer cable, Bluetooth, or Wi-Fi.
- Low tolerance filament: To print the calibration cube, you need filament with a low/tight tolerance. Low tolerance filament has consistent thickness across the entire spool and extrudes uniformly, creating accurate prints. If you use general-purpose/high tolerance filament, its inconsistent thickness may cause over/under extrusion in some areas, affect the print’s measurements, and you might not get a clear picture of the mechanical accuracy of your 3D printer.
- STL file of a calibration cube: This is the image of the cube that your printer will print. You will match the dimensions of the image in the file to those of the printed cube.
- Digital calipers: These will measure the dimensions of the printed cube.
- Calculator: Calibration will involve multiplying and dividing different values.
The Best 3D Printer Calibration Cubes
There are plenty of calibration cube models you can work with, each with its specific features. Here are some of the most popular calibration cubes:
Basic Calibration Cube
- Download: Thingiverse, MyMiniFactory, YouMagine
- Designer: iDig3Dprinting
- Price: Free
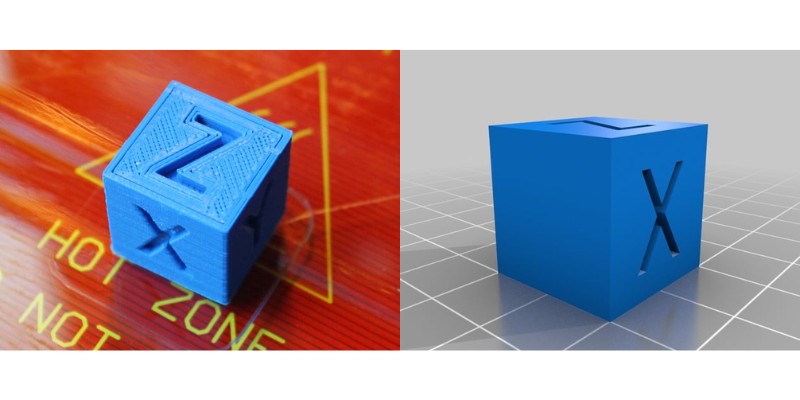
A starting point for 3D printer calibration, this straightforward cube tests the fundamental accuracy of the printer. It often comes with labeled axes and is used to check if the printer can make accurate movements along the X, Y, and Z axes.
The classic cube model measures 20mm x 20mm x 20mm, and if your printed cube measures very close to those dimensions, the printer is properly calibrated.
Hollow and Thin-Walled Cube
- Download: Thingiverse, Cults3D
- Designer: Dercracker
- Price: Free
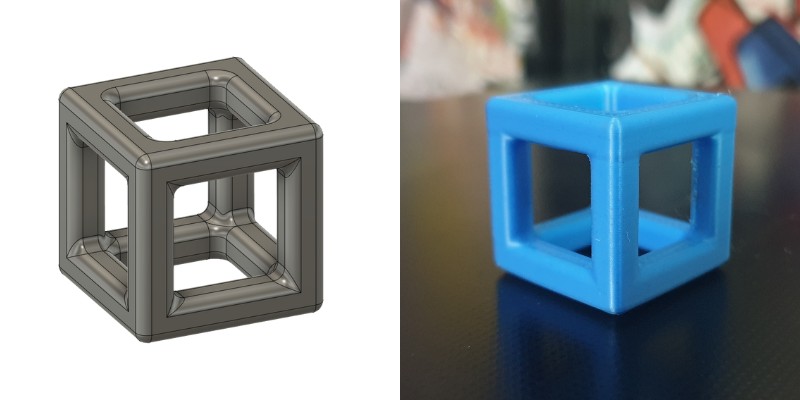
Hollow cubes have hollow faces and no infill pattern, so they’ll save you some filament while testing your printer’s dimensional accuracy. But more importantly, they can test a printer’s bridging capabilities, retraction rate, and extrusion rate.
If you notice any hanging or drooping structures on the top edges of this print, it means you need to fix the bridging settings in your slicer.
Themed Calibration Tools
- Download: Thingiverse, Printables
- Designer: Dezign
- Price: Free
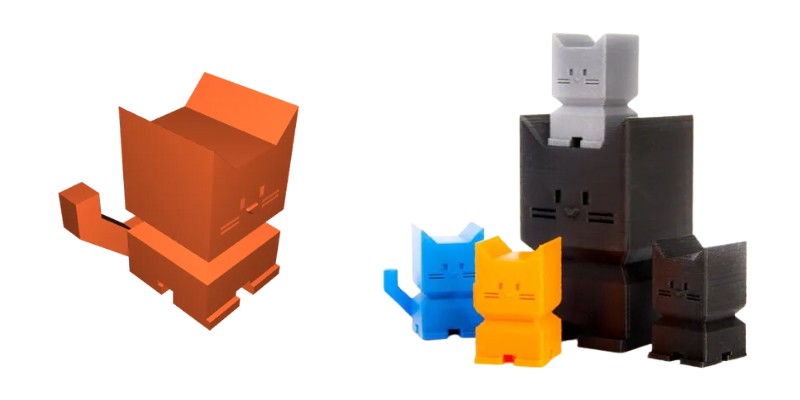
Want to put an edge to your calibration prints? Try a themed calibration model to check your printer’s performance with an aesthetically pleasing result on your build plate. Themed calibration models are fun and creative alternatives to the traditional calibration cube, often designed in the shape of animals like the Cali cat.
Cali cat is great for testing 3D printer overhangs, surface finish, bridging, and accuracy of dimensions. But if you’re not a cat person, you can always try the cali dog instead.
Layered Dimensional Cube
- Download: YouMagine
- Designer: Make Magazine
- Price: Free
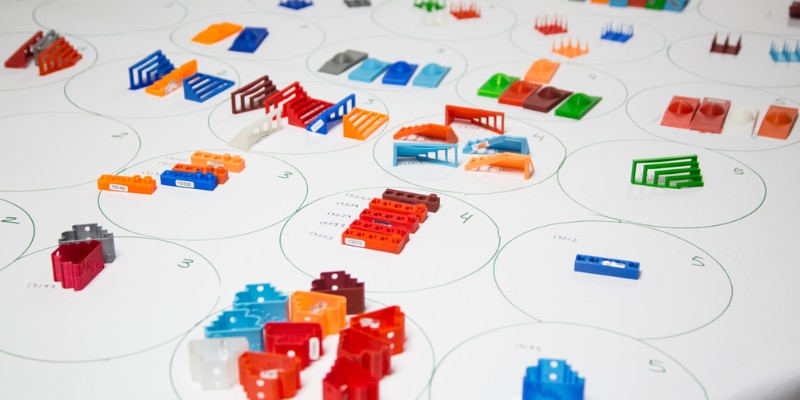
This type evaluates the printer’s ability to maintain consistent dimensions across varying layers. It’s especially useful for identifying issues related to material shrinkage.
Layered dimensional cubes consist of a stack of 4 cubes each with different dimensions, say 25 mm, 20 mm, 15 mm, and 10 mm. In a well-calibrated printer, each of these layers should come out with the same dimensions. But if each layer deviates from the expected dimensions by a different length, this is a signal that there is a material shrinkage problem.
Printing the Calibration Cube
To print the calibration cube, load the STL file onto your printer and start printing the way you would print other objects. Make sure that the edges of your cube model align with the right axes when you export the file in your slicer. Some cube models, like the XYZ classic cube, have labels and this makes it easy to identify the orientation of the cube on the axes.
Others don’t, but you can confirm where the cube is facing by looking at the axis arrows in the slicer. You’ll see a red arrow pointing in the direction of the X-axis, a green arrow pointing in the direction of the Y-axis, and a blue arrow pointing in the direction of the Z-axis. Once you’re certain that the cube is facing the right direction in the slicer, slice it and get ready to print.
Before you print, however, ensure that your printer’s build plate is leveled. This will test the Z-axis accuracy without the printing inaccuracies created by an unleveled build plate.
When the cube has finished printing, identify which side corresponds to the X, Y, and Z axis before taking it off the plate. A simple way of doing this is to command the extruder to move in the direction of the x-axis.
Next, take the cube off the plate and take out the calipers to measure its dimensions. Measure each side and note down its length in millimeters alongside its corresponding axis.
Calibrating Your 3D Printer
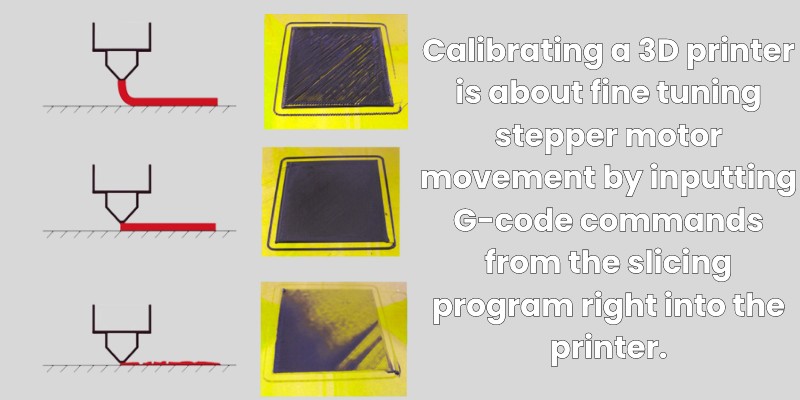
Calibrating a 3D printer is about fine-tuning stepper motor movement by inputting G-code commands from the slicing program right into the printer. Here is how to calibrate a 3D printer using G-code commands:
- Connect your 3D printer to a computer with the slicing software.
- Open the slicer.
- In Octoprint, go to the “Terminal” tab, enter M92, and click “Send”. This will bring a set of values that show the printer’s current steps per millimeter in the different axes. For example, x95 y88 z98.
- Record these values
- If you notice a variation of more than 0.025 mm between the dimensions on the printed cube and those on the model, fine-tune the steps per millimeter using the following procedure.
- Divide the x-axis length of the cube model by the x-axis length of the printed cube. For example, if the calibration cube model measures 20 mm in the slicer and your printed version measures 20.55 mm, divide 20/20.55 to get the ratio of 0.9732.
- Do the same for the other two axes and record the calculated ratio.
- For each axis, multiply its ratio by the corresponding result you got from the M92 command. For example, if the M92 command brought back x95 on the axis, multiply 95 x 0.9732 to get the new steps of 92.5. A summarized formula for this process is:
new number of steps per mm = (m/p) x c
where;
m = model length
p = printed length
c = current number of steps per mm - It’s important to double-check these calculations because your printer will always go with the last input you gave it. You can tell that your new values are correcting your stepper motor motion if they increase or decrease accordingly. For example, if your printed length was longer than the model length, the new steps should be less than the old steps.
- To input the new step values, type M92 command again and type in the new values of each axis, preceded by the letter of the corresponding axis. For example, if your new values are all 100, the command should be M92 x100 y100 z100.
- Click “Send” to confirm the new values. Your printer should now be properly calibrated to print accurately in all dimensions.
More Troubleshooting with Calibration Cube
In addition to diagnosing dimensional accuracy, calibration cubes can help troubleshoot several printing mishaps. These include ghosting, warping, and elephants foot.
Check the links to our full guides to each of these problems if using a calibration cube doesn’t get to the bottom of your issues!
“Our printers don’t just print objects, they print ‘oops’, ‘ah-ha’, and ‘not again’ moments.”



0 Comments